Mark Meyer | Parametric surfaces
 Here are some interesting ways to play with parametric equations in NodeBox. Both the harmonographs and the 3D surface plots are based on parametric equations. All of these are basically a variation on a theme. The central idea is: using parametric equations to create some interesting visualizations and seeing where it will take me. I don't feel like this is done as it is pretty rich ground for playing around with things.
I've tried to start with some very basic code and then build up more complex examples.
- Mark Meyer (http://www.photo-mark.com/)
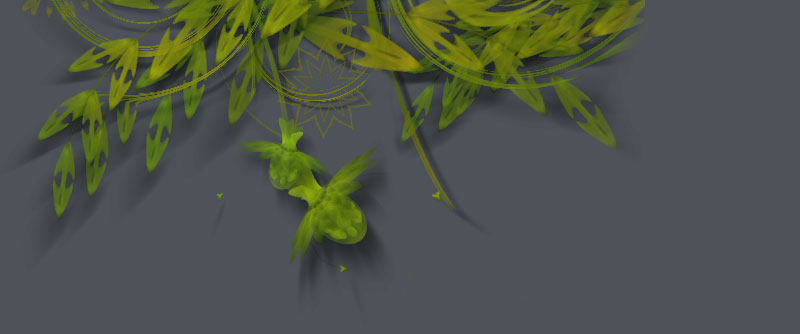
Harmonographs
The harmonographs are the easiest since they are based only on the equation of a circle. You can plug any value into t and you end up with a point somewhere on the circle. If you vary t with a constant rate you will skip around the circle at a uniform rate.
x = center_x + sin(t) * radius
y = center_y + cos(t) * radius


Python generators are an elegant way to set this up so you can work with several circles at once, which is the essence of these kind of designs. Here we define a circle generator that yields new generations of the equation based on a radius r and a dt parameter. The dt parameter is the change in time around the circle in degrees:
from math import sin, cos
def circle_equation(r, dt):
    center_x = 0.0
    center_y = 0.0
    t = 0.0
    while True:
        x = center_x + cos(t) * r
        y = center_y + sin(t) * r
        yield x, y
        t += dt
 | This is a basic example using only one instance of the generator to draw interior lines inside the bounds of a circle:eq = circle_equation(85, 4.5) x, y = eq.next() beginpath(x, y) for i in xrange(74): x, y = eq.next() lineto(x, y) endpath() |
 | This is almost the same script, but uses two instances of the generator with different values of dt, essentially traversing the same circle at different rates. Varying the values of the circle radius, and rate of change of dt leads to infinite and often interesting variations. Like the harmonograph these show the interaction between to frequencies and are a way of visualizing musical intervals. An interesting feature of these is that that varying each value of dt while keeping the ratio between them constant creates similar designs. |
 | A further development using four generators that determine the control handles for curves: x1, y1 = eq1.next() x2, y2 = eq2.next() x3, y3 = eq3.next() x4, y4 = eq4.next() curveto(x4, y4, x3, y3, x1+x2, y1+y2) |
 | Further variation on how the points (from two generators) on the circles are used. Also adding some subtle color for an organic sense of depth. Since it is so easy to create such a wide variety of designs, I've got a lot of examples available if you want some more. |
3D parametric surfaces
Now onto 3D parametric surfaces! Like the harmonographs these are based on a set of equations controlled by parameters, but this time there are three equations for each axis and two parameters.


Since I used the circle equation in the harmonographs I'll start here with the simple and beautiful parametric equation of a sphere:
def x(u,v): return radius * sin(u) * cos(v)
def y(u,v): return radius * sin(u) * sin(v)
def z(u,v): return radius * cos(u)
Generally, the parameters (u and v) in these equations have a certain range or domain over which the surface is defined. In the case of the sphere the domain is:
u = 0 -> π
v = 0 -> 2 * π
To render the sphere what we want to do is go through the values of u and v at specific intervals and make our plot. How small that interval is determines our resolution. Too few and we end up with a very rough sphere, too many and it can take a very long time to render. I'll call the number of samples of u and v needed n. Because we eventually want to do cool things like rotate and shade our object we will begin expressing our points as a matrix shaped n by n by 3.
There are a lot of ways to create this matrix, one obvious one is to loop through all the values of u and v and add them to the matrix, but this can be quite slow. The Numeric module included in NodeBox provides a fromfunction() command that creates a matrix from a function, which is just what we are trying to do. Implementing it for complex equations is cryptic and makes the code a little hard to understand, but it is fast and we will want to use some of Numeric's functions later.
def fit_to_domain(u, v):
    u = 1.0 * u / n * pi
    v = 1.0 * v / n * pi*2
    return u, v
from Numeric import *
def matrix(u, v, index):
    u, v = fit_to_domain(u, v)
    return where(index==0, x(u, v),
                 where(index==1, y(u,v),
                    where(index==2,  z(u,v), 1)
                    )
                 )
sphere = fromfunction(matrix, (n+1, n+1, 3))
Once we have the matrix we can loop through it and build quadrilaterals by picking the vertices we want and drawing them in nodebox. When drawing these we just throw away the z coordinate (we want it in the matrix for rotation and shading, but don't need it for drawing). This creates a rendering with no perspective, also called an orthographic rendering.
 | Not too exciting: we are looking straight down on the pole. It just looks like a polar coordinate grid. |
 | Since our vertices are in a matrix, it is surprisingly easy to rotate our shape. Here we simply add a rotate_matrix() function which multiplies the matrix by three standard transformation matrices using Numeric's matrixmultiply() function. To make it a little more interesting we'll add some sliders for the axes. Now we have some resemblance to a 3D object. |
 | We add some code that looks at the individual quadrilateral facets that we draw and determines their normal vector. The normal vector is a vector perpendicular to the surface of the facet. Once again Numeric helps us: the normal can be determined by taking the cross _product() of two nonparallel vectors of our facets (i.e. the edges). We then normalize this vector's values between -1 and 1. To do this we simply divide it by its length. With the normal vector we can determine the angle between the light source and our facet and calculate an appropriate fill brightness. |
As you rotate the sphere you will notice some strange artifacts. These are caused by the fact that we are not paying any attention to the order in which we draw the facets. It is possible to see facets from behind the sphere drawn on top of closer objects.
To fix this we will take advantage of Nodebox's canvas sorting. We want to sort the facets based on their z coordinate, so we will store the z coordinate directly in the path and at the end we will sort them and redraw the canvas:
sorted_grobs = list(canvas)
sorted_grobs.sort(lambda p1, p2: cmp(p1.z, p2.z))
canvas._grobs = sorted_grobs
While we are at it, we can speed things up a bit by culling the facets that are facing away from us. To do this we add a constant vector which points at the viewer along the z axis:
view = array([0, 0, 1], Float)
Then we compare the facets' normal vectors to it and don't draw them unless the dot product of the view vector and the normal is greater than zero. On non-closed surfaces you may want to see the backside of facets away from you, so you may want to comment this out in certain instances.
Once you adjust the sphere and lighting to your liking, bump the value of n up a little to get a smoother drawing (because we are dealing with so many points this can be quite slow).
Taking it further
A couple of different parametric surfaces: the radial wave (ripple), the torus, a funnel and the trefoil knot. Consider all this a work in progress; I suspect my math may be off in places and some of the techniques used are pretty basic, so don't expect every equation you plug in to work without some tweaking. From here one can experiment with different shading or perhaps operations that work on the whole matrix to add distortions or other transformations.
 | The radial wave uses the following equation. We don't cull the facets here because the ripple's backside may show.def x(u,v): return radius * u def y(u,v): return radius * v def z(u,v): return radius * cos(sqrt((u**2)+(v**2))) u = -15 -> 30 |
 | The torus uses the following equation. The domain of u and v is determined by two radii: the total radius R of the torus and the radius r of the tube itself.def x(u,v): return (R + r * cos(v)) * cos(u) def y(u,v): return (R + r * cos(v)) * sin(u) def z(u,v): return r * sin(v) u = 0 -> 2 * π |
 | Below are the equations and the source code for two more complex shapes: a double funnel and the trefoil knot. def x(u,v): return r * cos(v)**2 * cos(u)**3 def y(u,v): return r * sin(v-1)**2 * cos(u)**3 def z(u,v): return r * sin(u)**2 u = -π -> π |
 | def x(u, v): return r * sin(3*u) / (2+cos(v)) def y(u, v): return r * (sin(u) + 2*sin(2*u)) / (2 + cos(v+pi*2/3)) def z(u, v): return r/2 * (cos(u) - 2*cos(2*u)) * (2+cos(v)) * (2 + cos(v+pi*2/3)) / 4 u = -π -> 2 * π |
| |
 | We can now experiment with different color schemes... colormode(HSB) t = float(i) / len(rows) * 2 - 1 fill( 0.6 + 0.2 * abs(t**2), 0.8 - 0.4 * light_angle, 0.3 + 0.7 * light_angle, 0.75 ) |
 | ... and different shapes! Like an exploded hexahedron for example. There are all sorts of values and vectors to provide interesting color. It might be possible to calculate specular highlights, shadows, or even add smooth shading using gradient fills from the Colors library. There are plenty of surface equations on the web, some will be quite challenging to tweak into nice renderings. Of course the ultimate would be getting OpenGL to work with NodeBox - then it would be unstoppable. |
Created by Mark Meyer