The Graphical User Interface

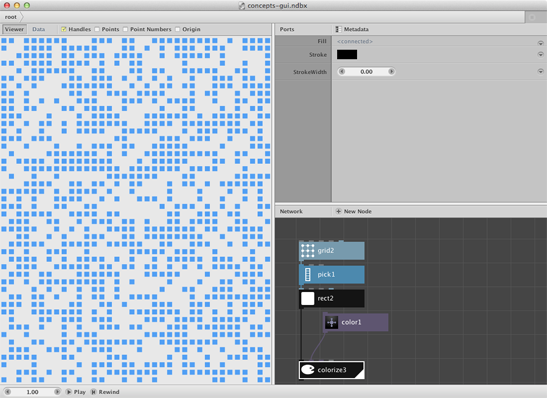
A NodeBox document window consists of these main components:
The Viewer Pane

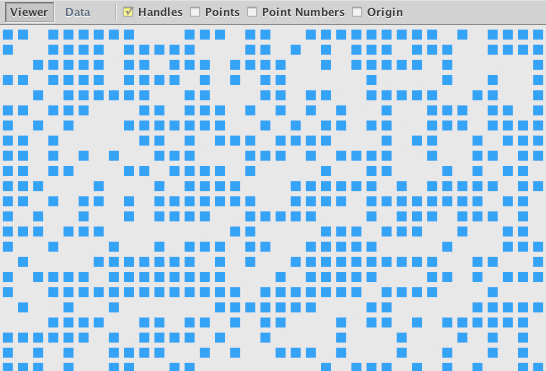
The Viewer Pane shows the actual drawing. It also shows handles for the currently selected node. In addition, it can show geometric detail such as the location of the points, their index numbers and the origin.
With your mouse in the viewer pane:
- Use the scroll wheel to zoom the view in or out.
- Hold the spacebar to pan the view.
- Right-click and choose “Reset View” to reset the view back to 100% zoom.
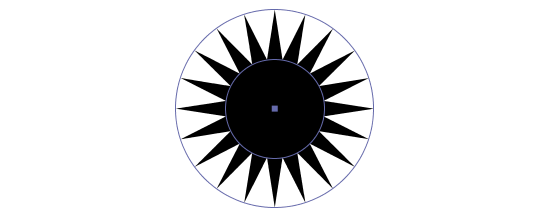
Most nodes have handles. They allow direct manipulation of the shape, which is generally easier than dragging numbers in the parameter pane.
 Handles for the Star node
The Port Pane

The port pane allows you to change the port values of the currently selected node. Each node has different ports depending on its function. Ports can have different types: numbers, text, colors, menus, etc.
Port values are draggable. This means that for each number you can:
- Double-click the number to enter a new number. Press enter to confirm.
- Drag the number to change it in increments of 1.
- Drag the number while holding the ALT key to change it in increments of 0.01 (for small changes).
- Drag the number while holding the SHIFT key to change it in increments of 10 (for big changes).
- Click the arrow keys to nudge it up or down by 1. Holding ALT and SHIFT nudge by 0.01 and 10, respectively.
Each individual port has a contextual menu:

- Revert to Default changes the port value back to its original value.
The Metadata button allows you to add your own ports to a node.
The Network Pane

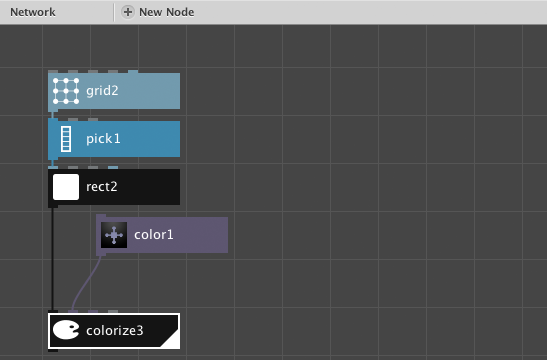
The network pane is where you connect nodes together to make networks.
- To show the ports of a node, click the node once. This shows the node in the port pane.
- To show the visual output of a node, click the node twice. This renders the node in the viewer.
A powerful feature of NodeBox is that you can change the port values of one node while keeping another node rendered in the viewer. This allows you to see the effects of your changes as they propagate through the network.
You can zoom and pan the network in the same you manipulate the viewer:
- Use the scroll wheel to zoom the view in or out.
- Hold the spacebar to pan the view.
- Right-click and choose “Reset View” to reset the view back to 100% zoom.
You can copy-paste nodes in one document and between documents. Because names in the network are unique, NodeBox will rename nodes as needed.
The difference between the selected and rendered node is explained in the getting started tutorial.
The Address Bar

The address bar is useful when using subnetworks. It allows you to jump back up a level. Read more about subnetworks.
The Animation Bar

The animation bar controls the animation features of NodeBox. You can:
- Drag the frame number to scrub through the animation.
- Double-click the frame number to go to a specific frame.
- Click play to start the animation from the current frame.
- Click rewind to stop the animation and go back to frame 1.
NodeBox Documents
NodeBox manages documents, much in the same way you work on a Photoshop document. Only in NodeBox we just save the nodes, since we can always recalculate the output of the network.
NodeBox documents use the .ndbx extension. These documents can be opened and saved only in NodeBox. To work with other programs, use the import and export functionality.
Importing Graphics
To import vector data use the import SVG node.
Exporting Graphics
To export the current image, choose File > Export. The export command doesn’t ask for an extension but automatically exports as a PDF file. PDF files retain all vector information and can be manipulated in vector programs such as Adobe Illustrator or Inkscape.
If you have an animation, you can export it in two ways:
- As a sequence of images. Use File > Export Range to export a sequence of images. NodeBox will name them progressively, e.g. myimage-1.png, myimage-2.png, …
- As a movie. Use File > Export Movie to export a movie using a variety of popular formats.